Build Your Own Platform as a Service
Transform your Kubernetes cluster into a full-fledged Platform as a Service with Edka.
This guide demonstrates how to configure a selection of apps and add-ons to enhance your Kubernetes cluster. You can choose to install any apps and add-ons according to your needs, either through the Edka dashboard, GitOps, or directly via the Kubernetes cluster API.
For this example, we’ll cover:
- Installing essential apps and add-ons (ingress, certificates, database, secrets management).
- Deploying your applications to your cluster an expose them to the internet.
Prerequisites
- A Kubernetes cluster in Edka (previously created). If you didn’t create one yet, see our Create Your First Cluster guide.
- One or more domain names that you own and can configure DNS records to point to your cluster ingress endpoint.
1. Install the required Add-Ons
Start by navigating to your cluster and select the Add-ons tab.
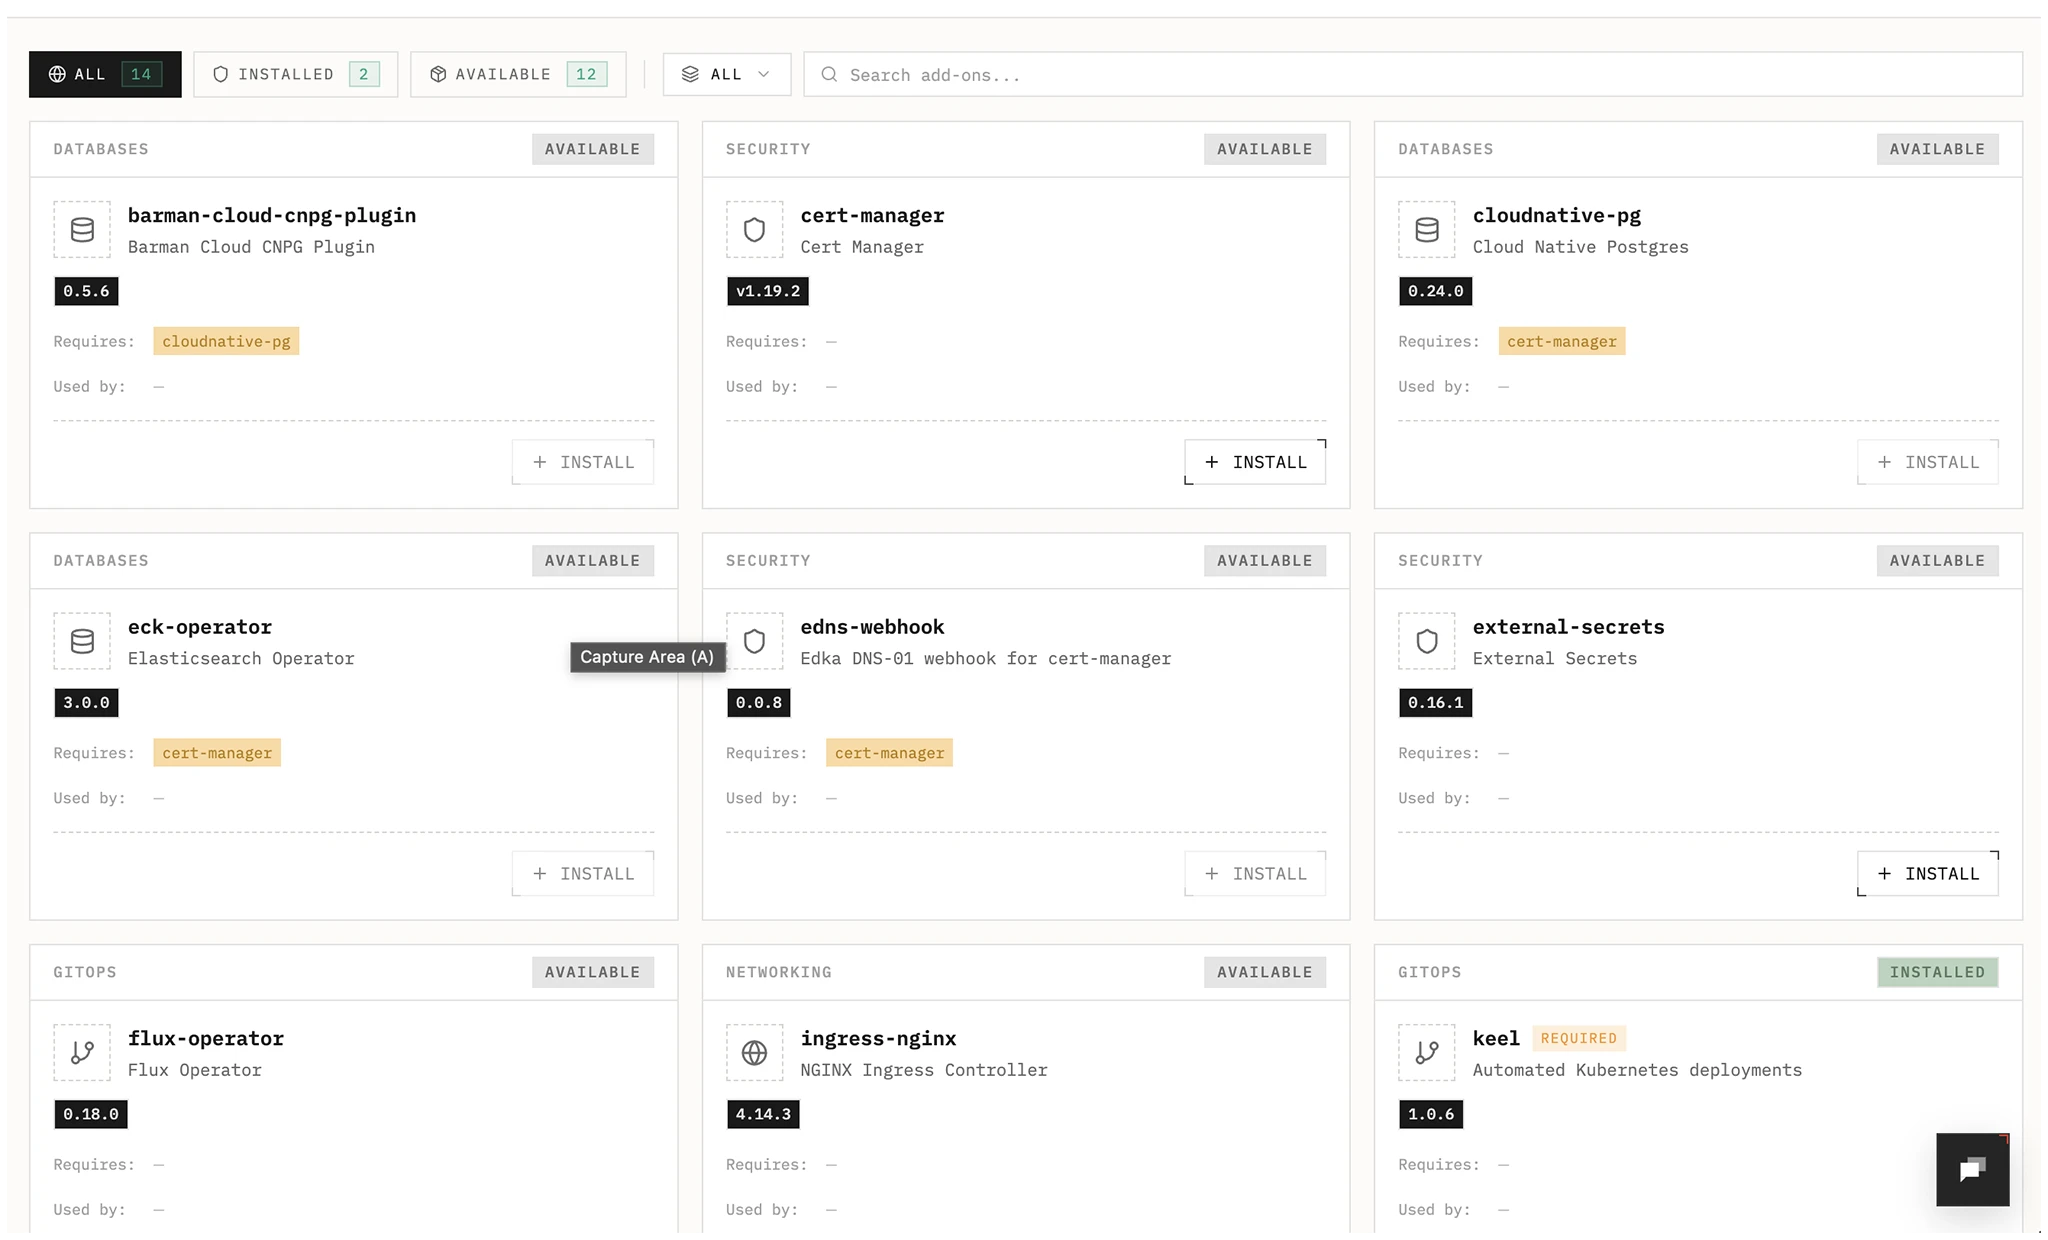
Edka provides a curated set of production ready add-ons that can be installed on your cluster. For this guide, install the following:
- Nginx Ingress Controller
An Ingress controller is required to expose your applications to the internet.
It automatically provisions a load balancer from your cloud provider and configures the necessary rules to route traffic to your applications. Once installed, the IP address of the load balancer will be displayed in the cluster overview. You can create a single or wildcard DNS record pointing to the IP address.
Learn more about how to use the Nginx Ingress Controller.
- Certificate Manager
It integrates with the Ingress Controller to automatically provision and renew TLS certificates for your applications. It also provides TLS certificates for in cluster services.
Learn more about how to use the Certificate Manager.
- Certificate Issuer
This is required to communicate with the certificate authority, in this example Let’s Encrypt, but you can configure other authorities directly in your Kubernetes cluster. Cert Manager add-on is required for this to work.
2. Install the required cluster Apps
For this example we’ll only install the PostgreSQL app, and you can install any available app later.
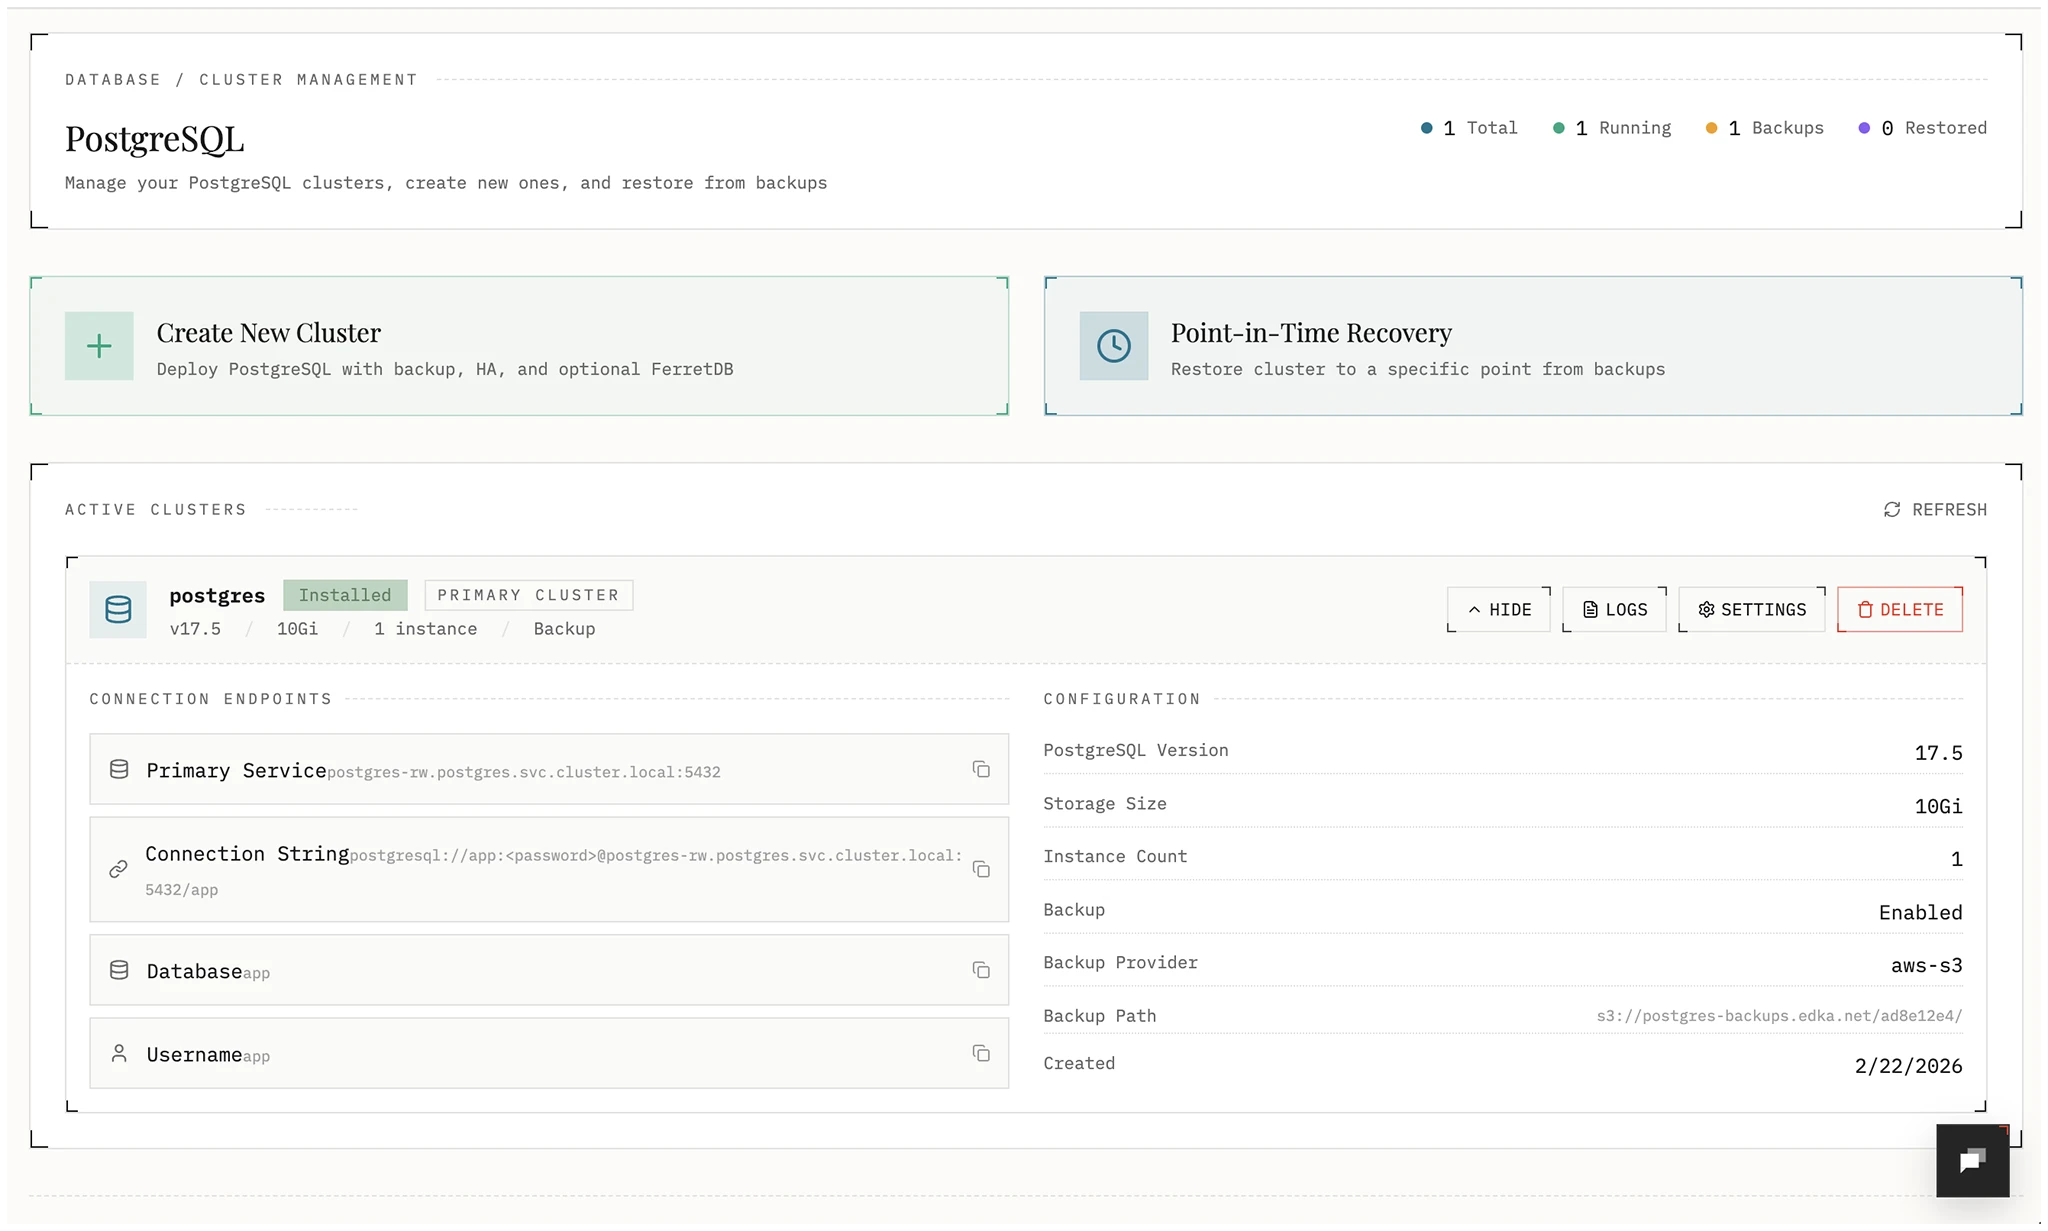
- PostgreSQL
Edka provides a UI to deploy PostgreSQL with high availability and point-in-time recovery. You can provision as many postgres clusters as you need, each with a single instance or a high-availability cluster with up to 3 replicas. Make sure your Kubernetes cluster has enough resources to run them without affecting the other workloads.
You can configure:
- Number of instances
- Storage allocation
- Continuous backups to S3 or GCS
- Restore to any point in time within the backup window
Note: Do not forget to copy the generated credentials to a safe place or provide your own credentials. You’ll need them later.
The necessary add-ons to run the cluster will be provisioned automatically during the first deployment.
Once deployed, you can get the connection string, service endpoints, database logs, and backup status. You can also update the configuration later and upgrade the storage size, update root password and increse the number of instances.
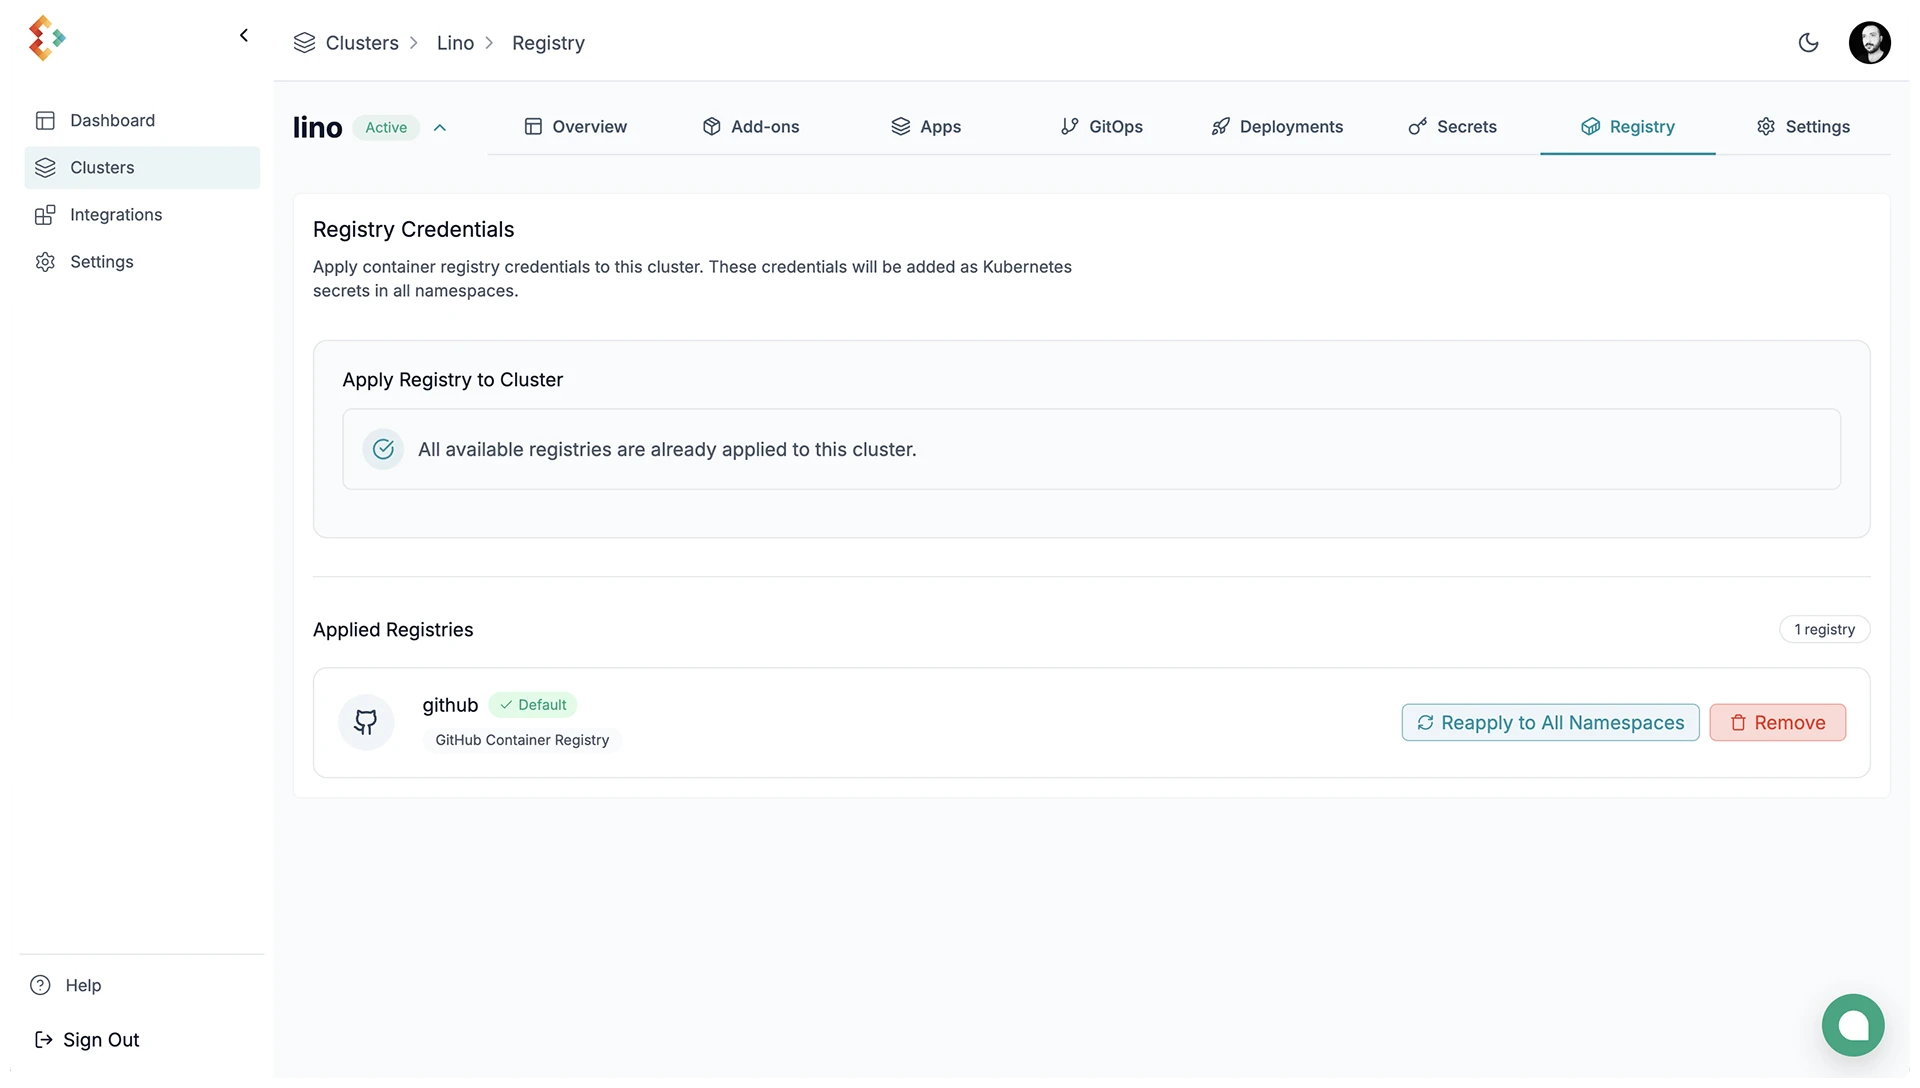
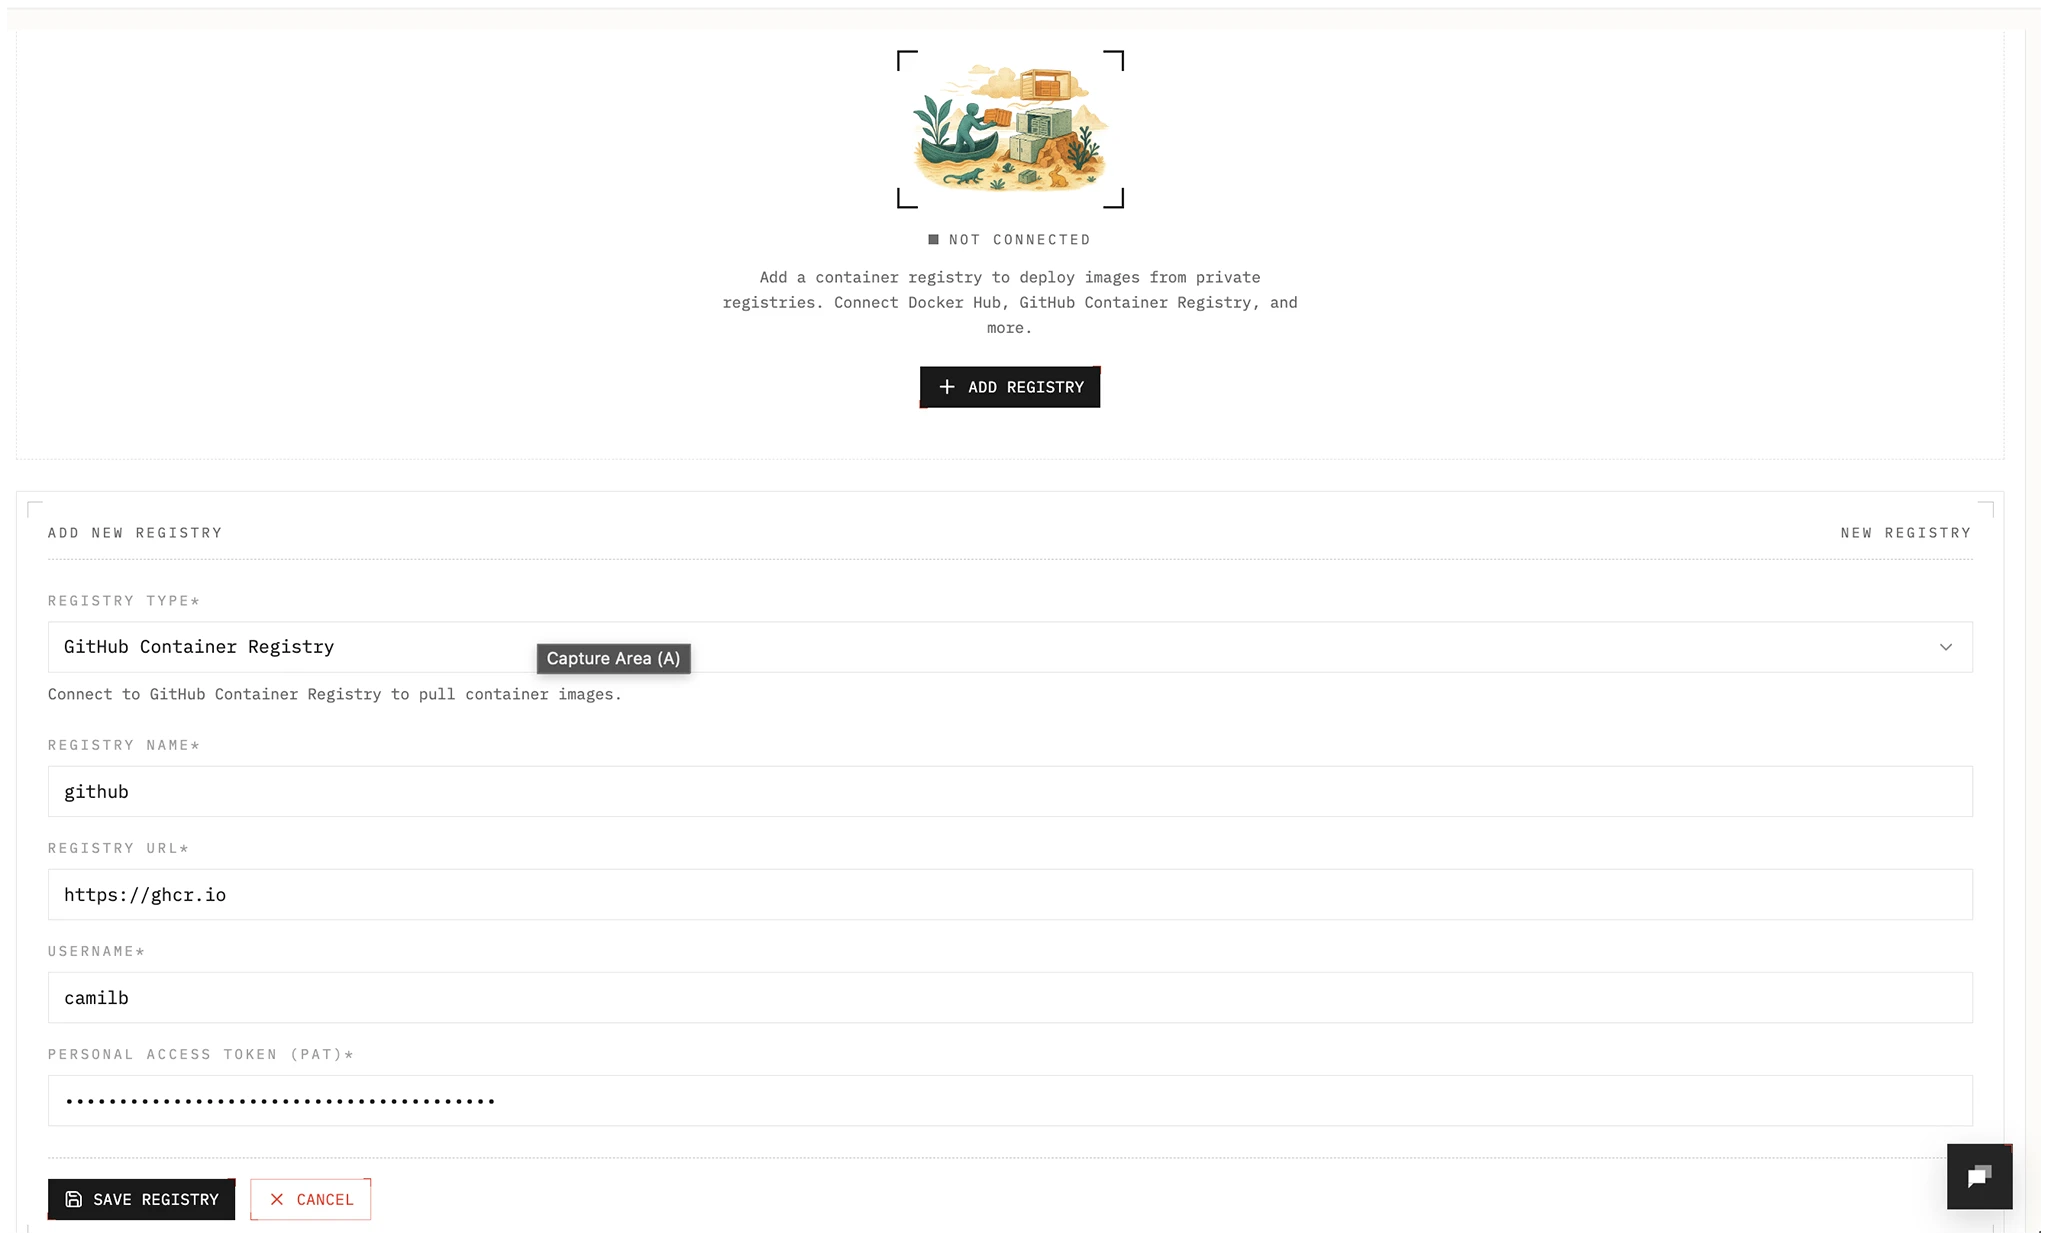
4. Connect a Container Registry
Edka supports several container registries, including GitHub Container Registry, Docker Hub, AWS ECR, and Google Artifact Registry. This example uses GitHub Container Registry.
Navigate to Settings > Integrations > Registry and select your container registry. Follow the specific instructions for your chosen registry to connect it to your account. By connecting it to your account, you can apply the registry to any cluster deployed with Edka.
Once connected, you have to enable the registry for your cluster and set it as the default registry for your workloads. If you plan to have multiple registries, you have to specify the registry to use for each workload.
This can be done in the Registry Tab > Apply Registry > Set as Default.