

Create Your First Cluster
This guide will help you set up your first Edka Kubernetes cluster.
Prerequisites
Section titled “Prerequisites”- A Hetzner Cloud account. If you don’t have one, see our Prerequisites page for detailed instructions.
- A Hetzner Cloud API token with read/write permissions. Check our Prerequisites page for detailed instructions.
Optional:
- kubectl (Kubernetes CLI - only necessary for advanced operations)
- Headlamp - a Kubernetes IDE (recommended for managing advanced operations with your cluster visually)
- Lens - a Kubernetes IDE (recommended for managing advanced operations with your cluster visually)
If you don’t have these yet, see our Prerequisites page for detailed instructions.
Note: Kubernetes knowledge is not required to use Edka, but it can be helpful for advanced operations.
Step 1: Create an Edka Account
Section titled “Step 1: Create an Edka Account”- Go to console.edka.io and click Create Account
- Sign up using your email or Google account
- Verify your email address
Step 2: Prepare Your Hetzner Token
Section titled “Step 2: Prepare Your Hetzner Token”- Generate a Hetzner API token with read/write permissions (see prerequisites)
- Decide how you want to use it:
- Store a token per cluster (recommended)
- Use a temporary token during creation (not stored)
- Use a global token integration. Useful for quickly creating a cluster without always having to provide a token.
Edka uses a unique token per cluster (recommended). You can add or update the token later in Clusters > your cluster > Settings > General. After the cluster is created, only the cluster owner and organization owners/admins can update or remove the stored cluster token.
Note: The account-level integration in Settings → Integrations → Hetzner (Global) is mostly recommended for testing and development purposes, but it can be used for production clusters as well.
Step 3: Create Your First Cluster
Section titled “Step 3: Create Your First Cluster”- In the Edka dashboard, navigate to Clusters
- Choose a name for your cluster (e.g., “clusterone”)
- Click Create Cluster
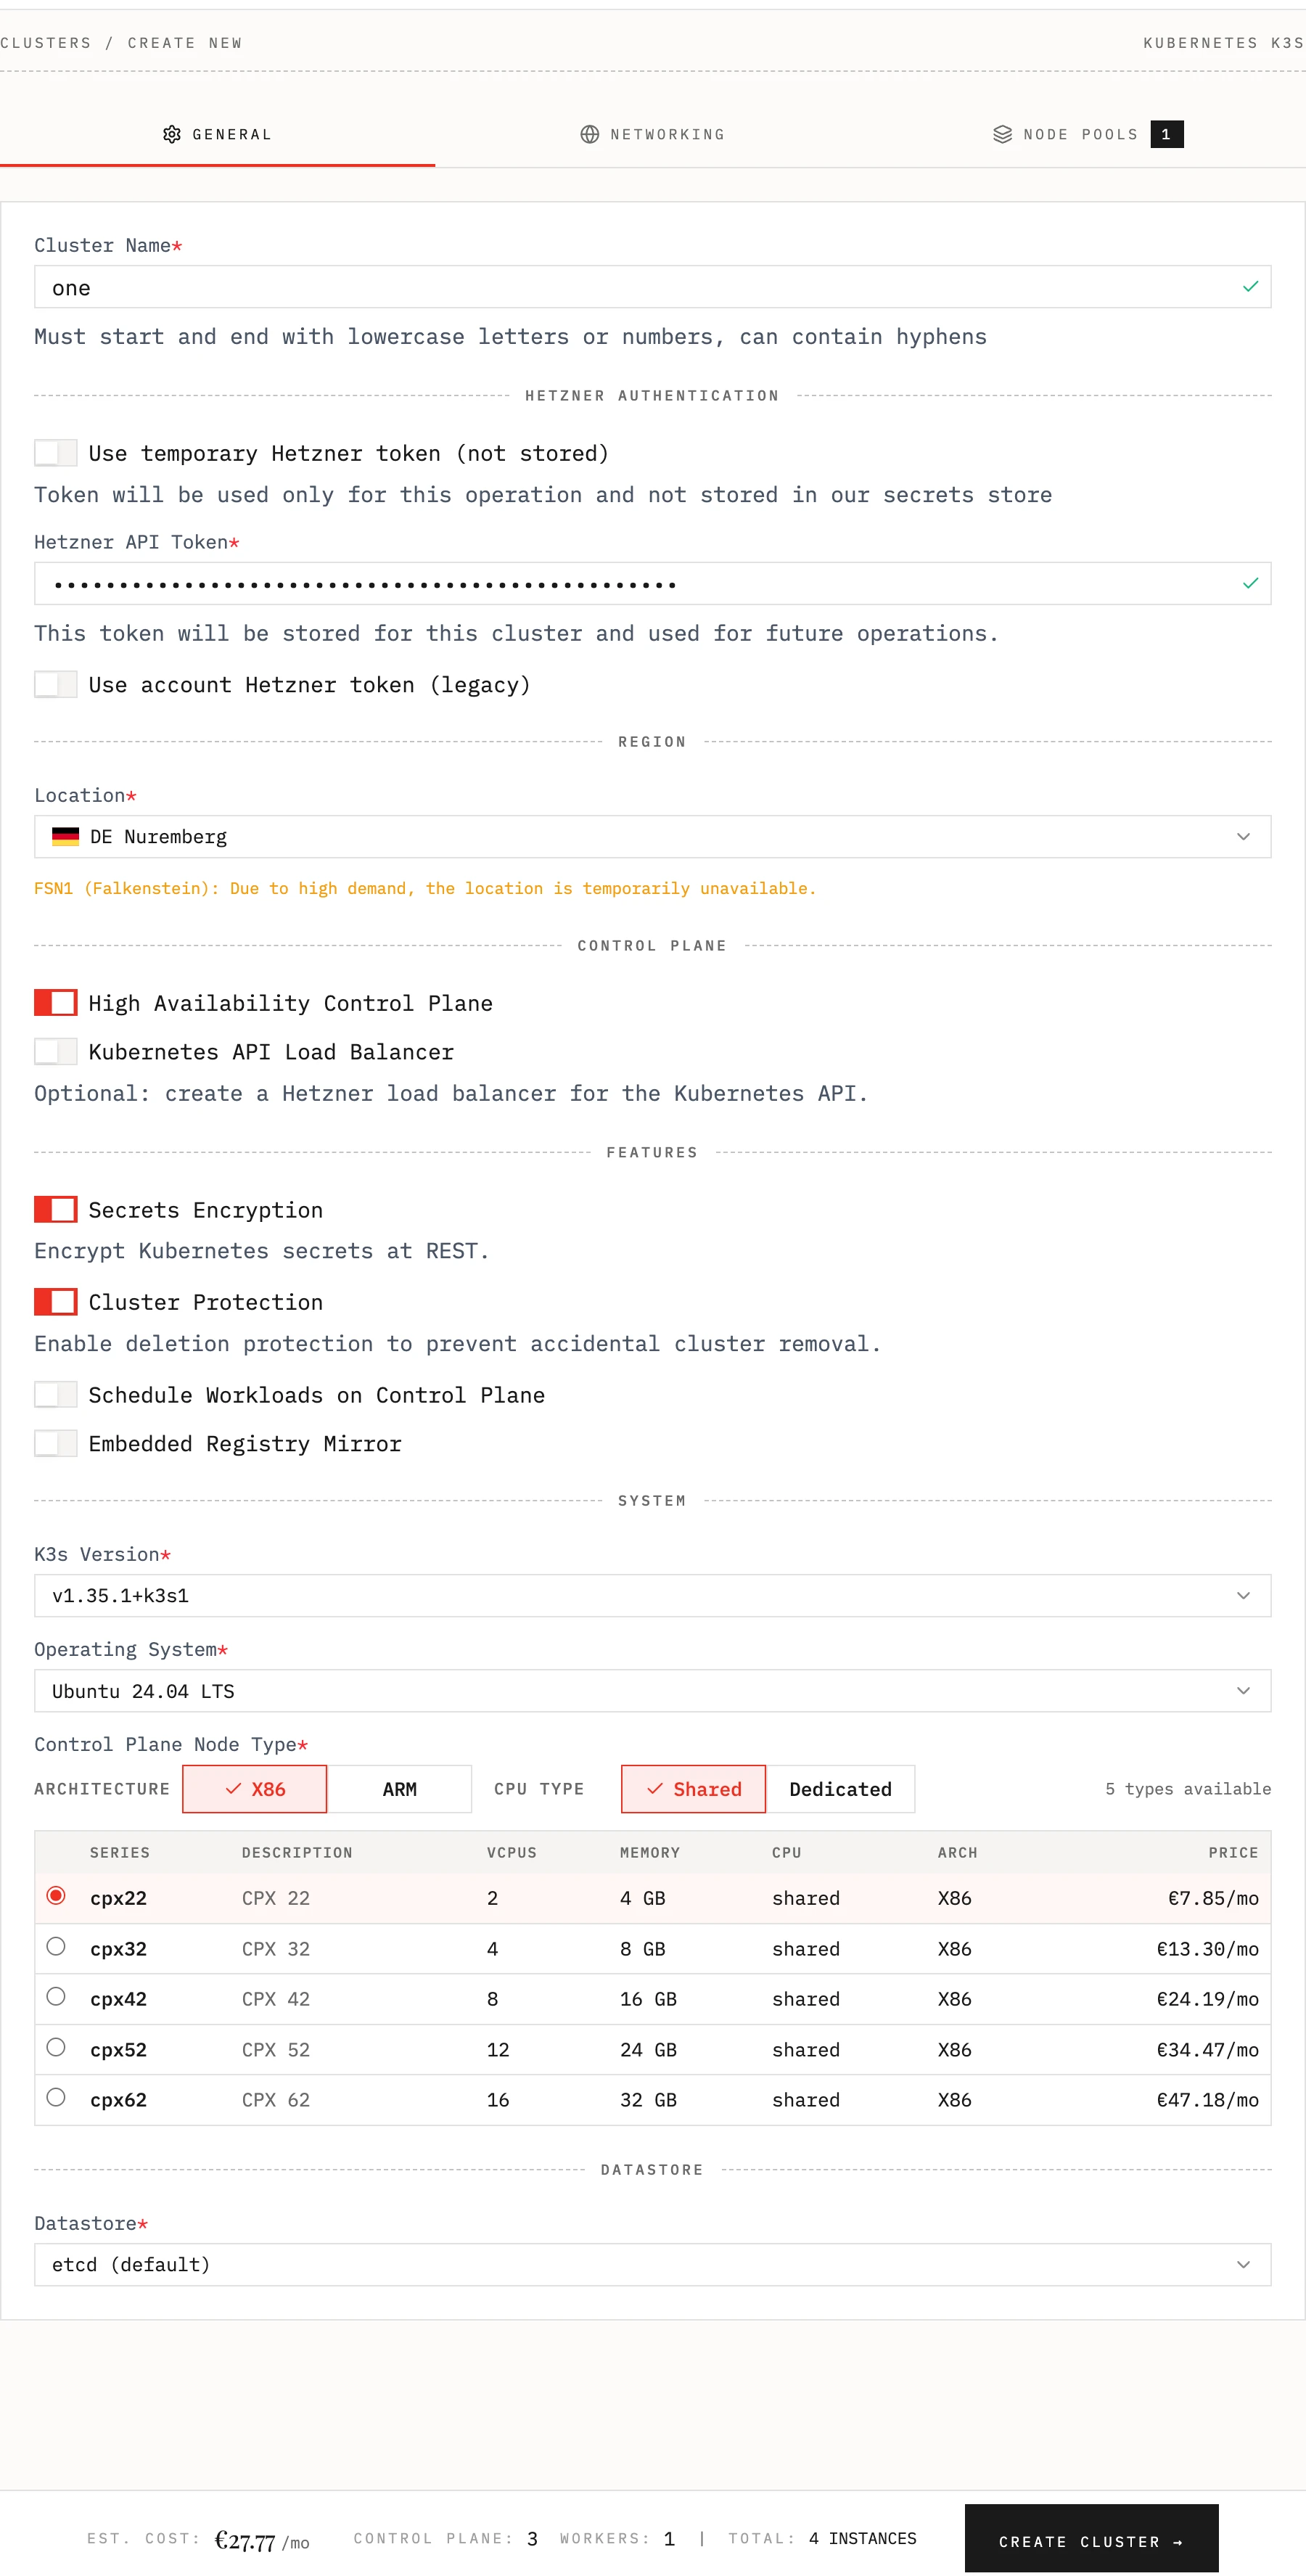
Edka configures an embedded etcd datastore automatically for every cluster.
Optional settings:
- Cluster location (e.g. Nuremberg)
- Kubernetes version (e.g., 1.36.0-k3s1)
- Instance type for control plane and node pools (e.g., CX23)
- Set a highly available control plane (recommended for production)
- Use a Load Balancer in front of your Kubernetes API
- Encrypt Kubernetes secrets at REST
- Enable deletion protection to prevent accidental cluster removal
- Schedule Workloads on Control Plane
- Embedded Registry Mirror
- Choosing the Operating System. Debian 13 (Trixie) is the default. Available
images:
- Debian 13 (Trixie)
- Ubuntu 24.04 LTS
- Ubuntu 26.04 LTS
- Customize the network settings in the Network tab
- Choose between Flannel or Cilium CNI and enable CNI Encryption
- Restrict the access to instances SSH and Kubernetes API to your own IPs
- For clusters larger than 100 instances, you must use Host Firewall (Cilium). This enables Cilium host firewall and forces public networking with Cilium encryption
- Set the Private Network Subnet
- Enable NAT Gateway when private-network workloads need managed outbound egress or a stable Floating IPv4 source address
- Enable cluster backups and optionally set a custom AGE key for backup encryption
- Choose the number of instances and node pools in the Node Pools tab
- Set extra node label and taints.
- Provide a cluster token (stored per cluster), use a temporary token (not stored) or use a token stored per account
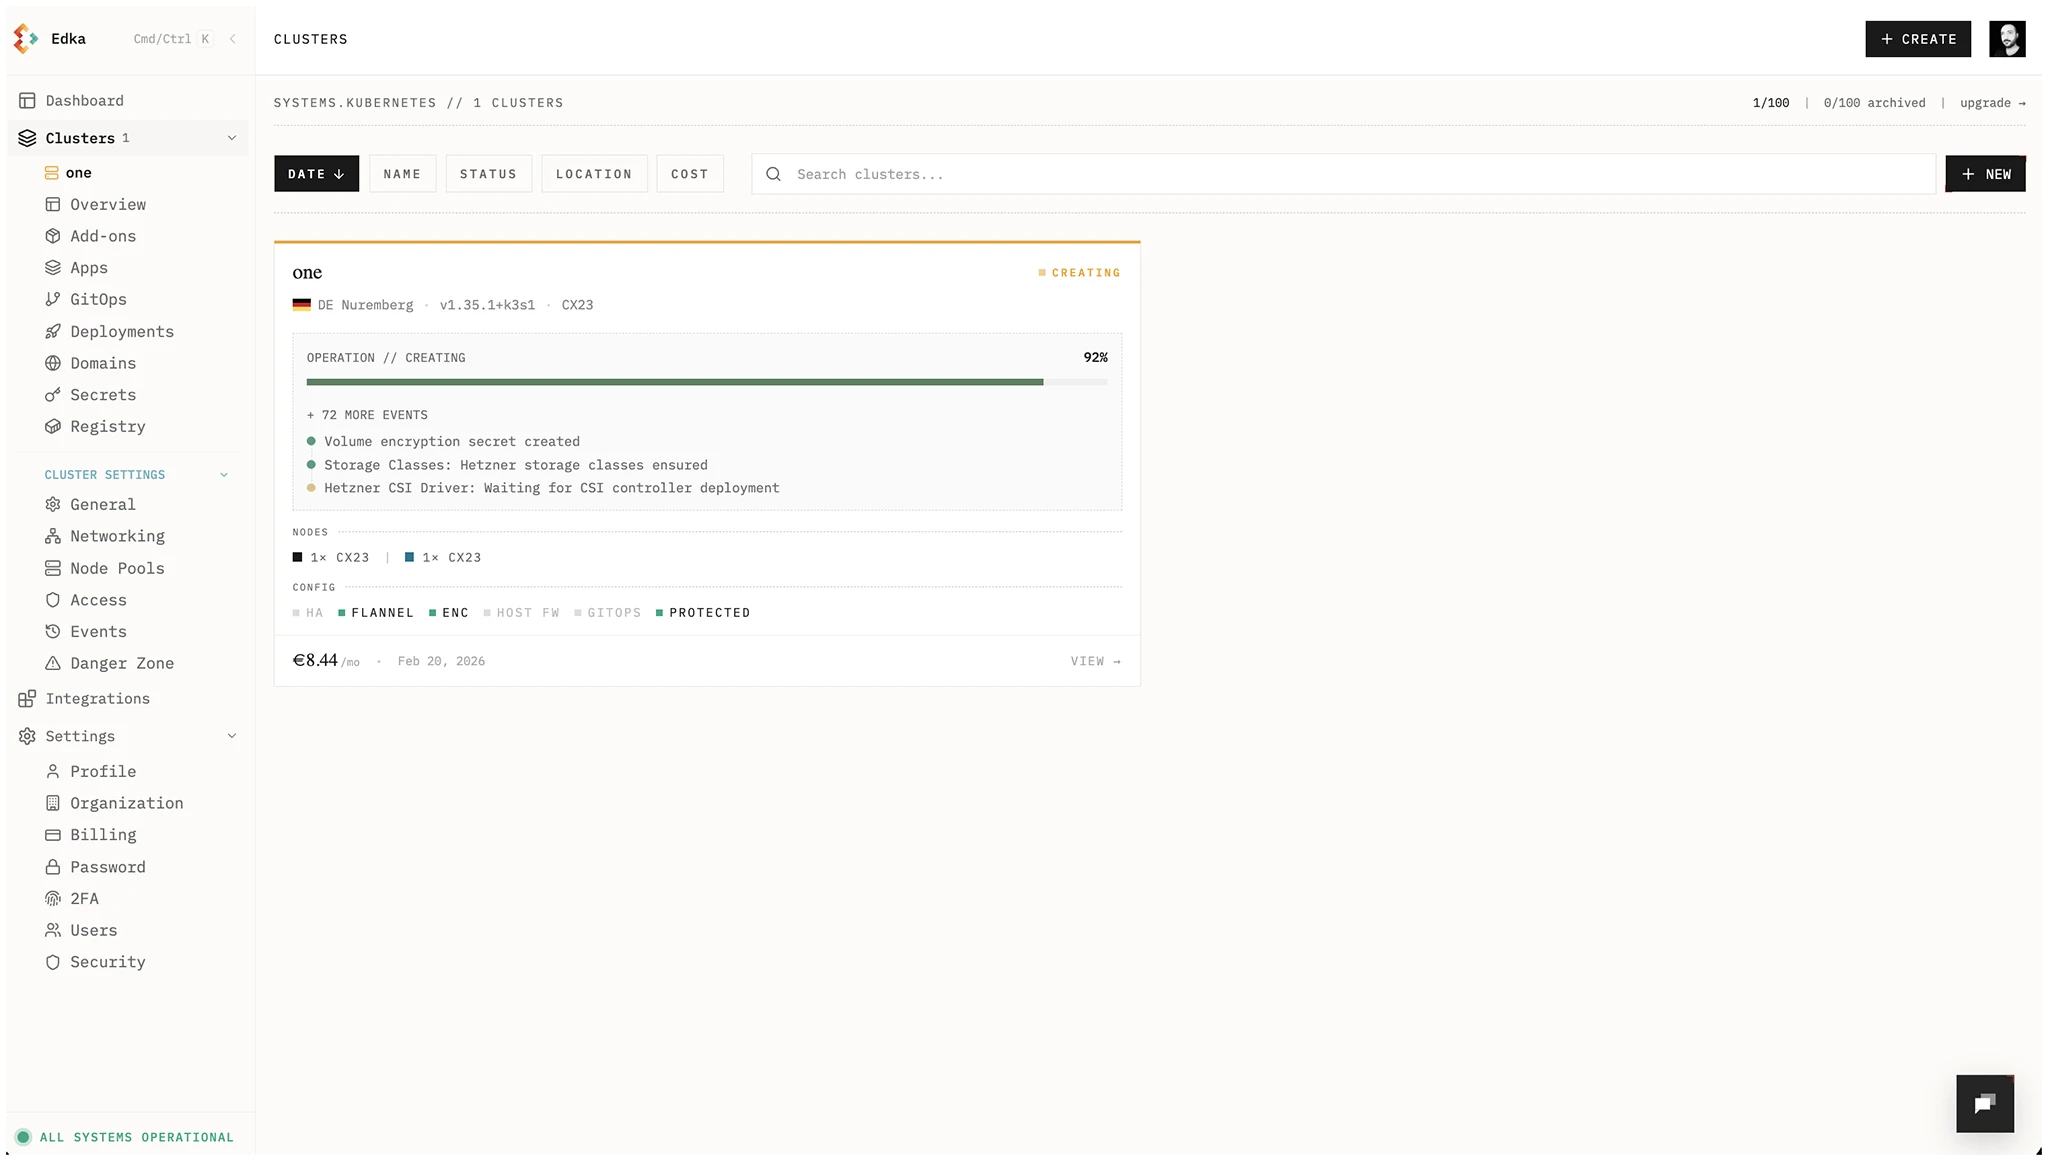
Edka will provision your Kubernetes cluster in about 2 minutes. You’ll see the progress and events as the process completes.
Cluster events are always accessible in the Cluster Events tab.
Step 4: Access Your Cluster
Section titled “Step 4: Access Your Cluster”- In the Clusters dashboard, open your cluster Overview or go to Settings > Access
- Under Kubeconfig, click Download Kubeconfig. Each user gets their own kubeconfig and downloads are audited.
- If you need a new kubeconfig, use Rotate Credentials in Access to invalidate the old one and download a fresh version. If your access is revoked, contact the account owner.
Set the KUBECONFIG environment variable to point to the downloaded file:
Admin note: Owners and admins can manage team kubeconfigs in Settings > Access under Team Access. Use Rotate to invalidate a user’s kubeconfig or Revoke to remove access.
export KUBECONFIG=/path/to/your/kubeconfig.yamlVerify the connection to your cluster:
kubectl get nodesYou should see a list of nodes in your cluster:
NAME STATUS ROLES AGE VERSIONone-master1 Ready control plane,etcd,master 2m30s v1.35.1-k3s1one-pool-default-worker1 Ready worker 1m45s v1.35.1-k3s1one-pool-default-worker2 Ready worker 1m45s v1.35.1-k3s1Alternatively, you can use Lens to manage your cluster visually. Just add the kubeconfig file to Lens and connect to your cluster.
Next Steps
Section titled “Next Steps”Now that you have your first cluster running, let’s set up some add-ons: